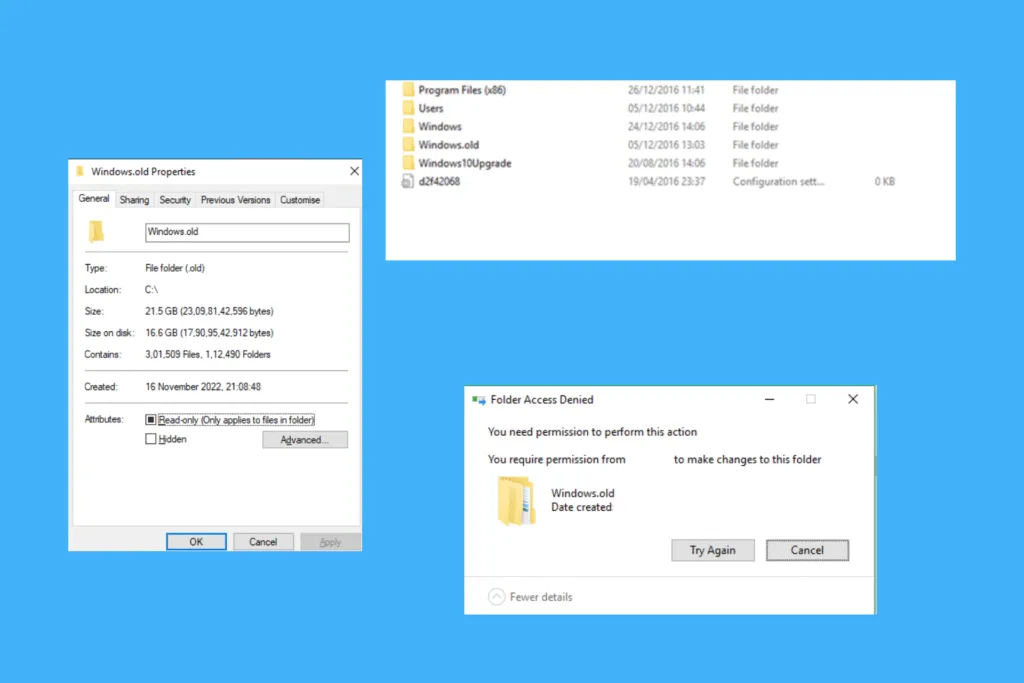
Did you recently upgrade Windows, say from Windows 10 to Windows 11, or install a major update? If so, there will be a Windows.old folder in the system drive (most likely, C:) taking up 20-30 GB of storage space. And if you are running out of free storage, you may want to delete Windows.old!
But, is deleting Windows.old safe? What are the risks? And what does the folder do? These are the questions we will take up in the following sections, and within the next few minutes, you will know all about Windows. old, in addition to all the ways to delete it.
What is the Windows.old folder?
The Windows.old folder stores data and files related to the previously installed version/iteration of the OS. It comes into play when you want to revert the changes, i.e., roll back to the previous Windows version. For instance, many who initially upgraded from Windows 10 to Windows 11 discovered that several programs were incompatible with the latest iteration, and they subsequently used the Windows.old folder to roll back to Windows 10.
Remember, your PC will automatically delete the Windows.old folder after 10 days. This is because Microsoft assumes that, by this time, you are facing no problems and won’t roll back the upgrade.
How can I safely delete Windows.old?
1. Delete the folder manually
Although neither the quickest nor the simplest, manually deleting the Windows.old folder ensures that files within it are completely removed from your PC, and that none are left behind, occupying crucial storage space. Besides, once you learn the method, you will be able to gain admin-level permissions for every system file and folder, and remove the non-critical ones from your Windows PC.
Here’s what you have to do:
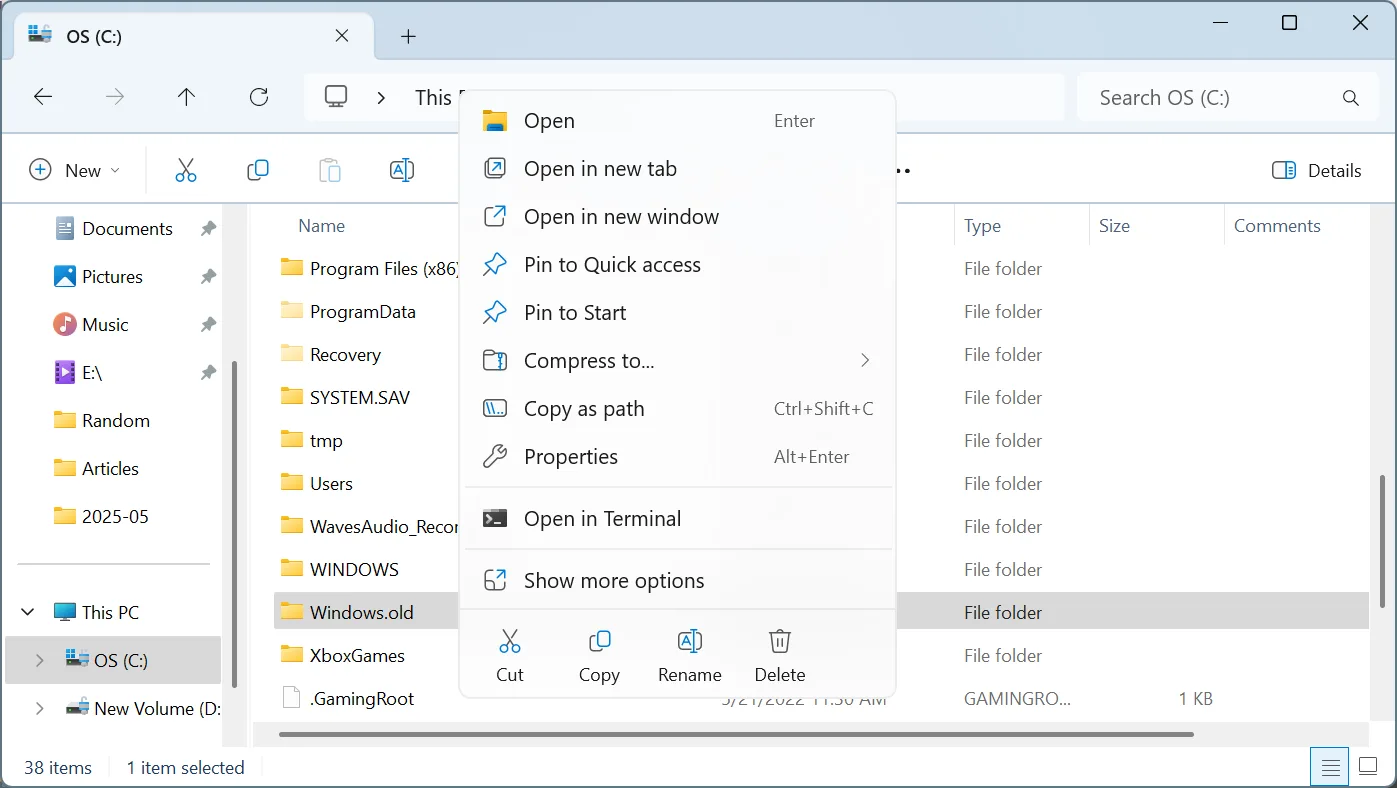
- In the “C:” drive, right-click on the Windows.old folder, and select Properties.
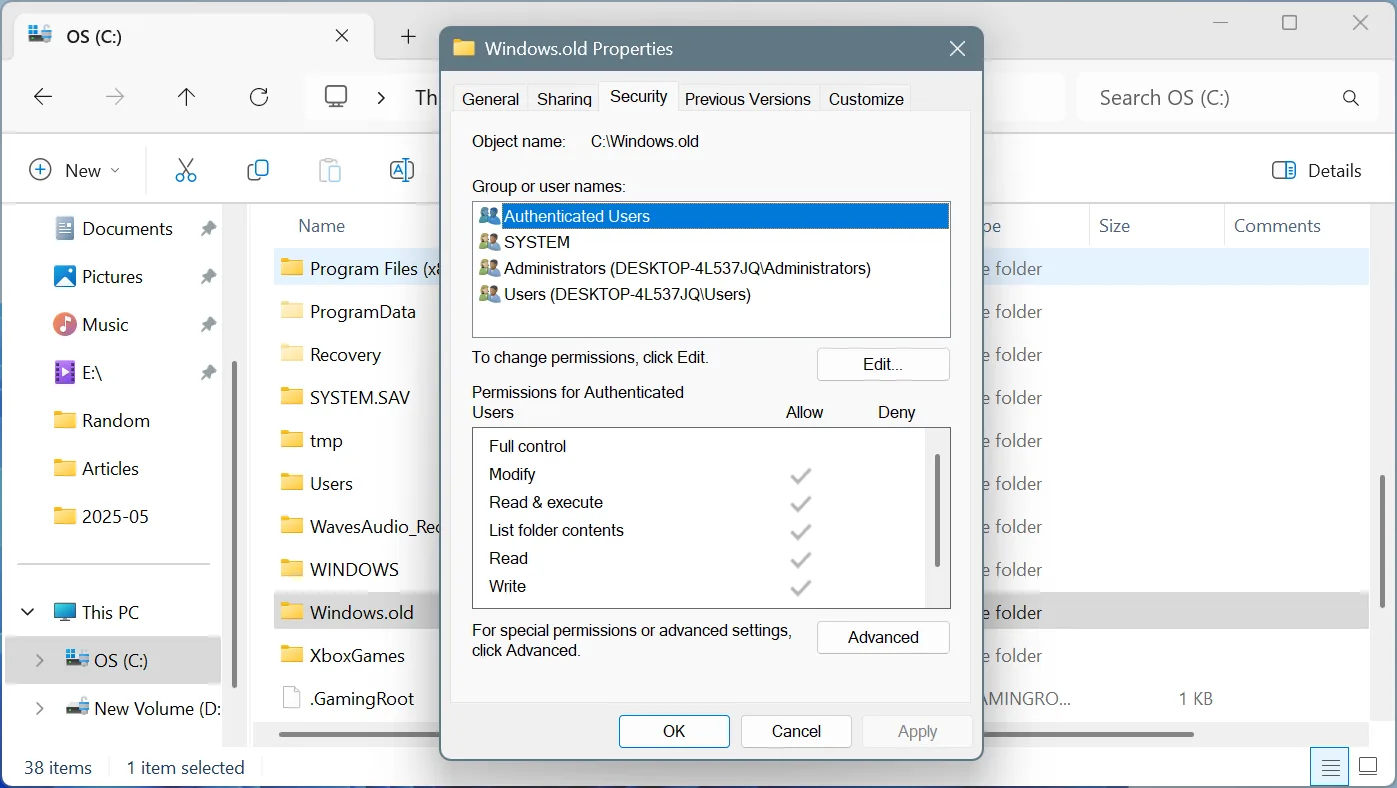
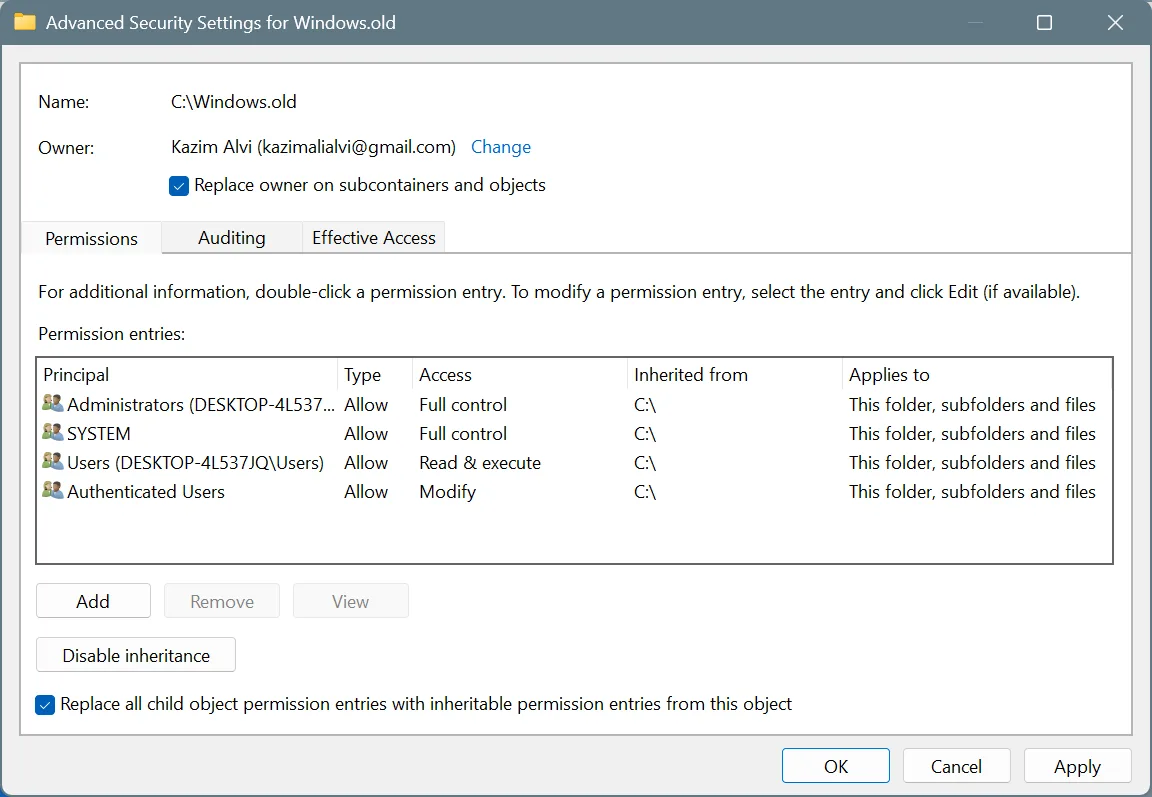
- Go to the Security tab, and click on Advanced.
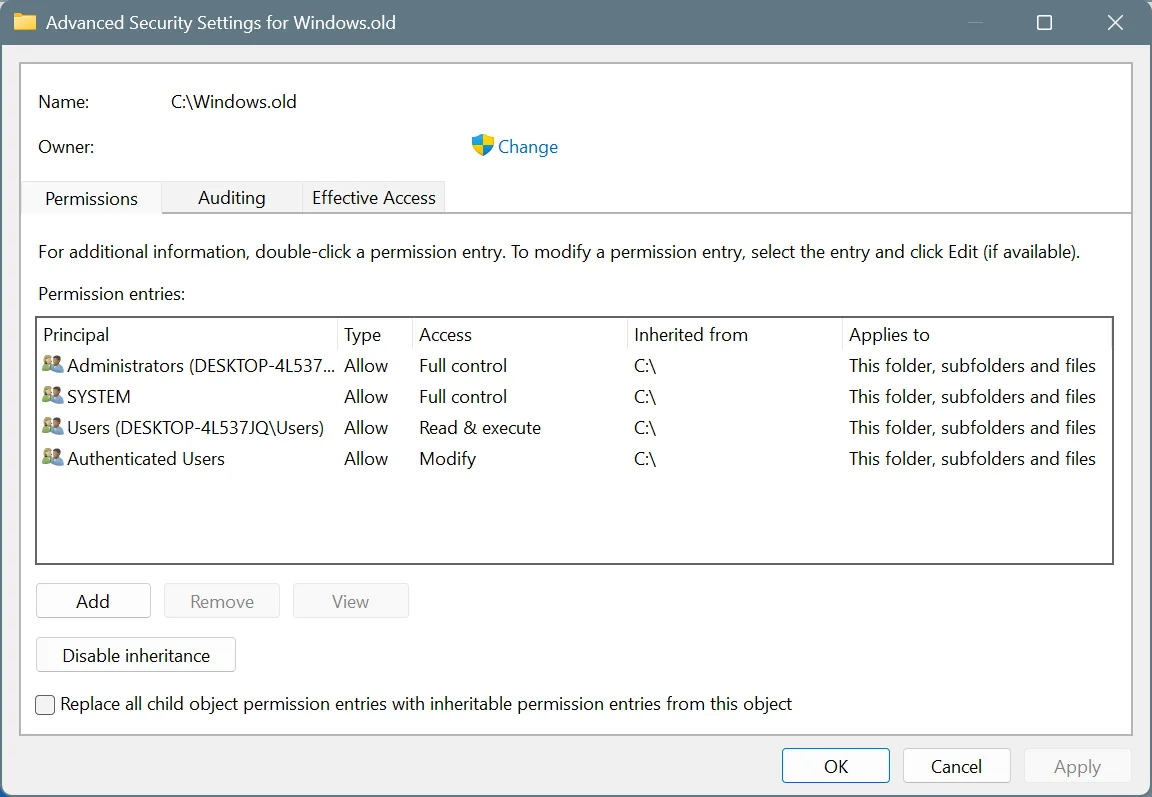
- Click on Change.
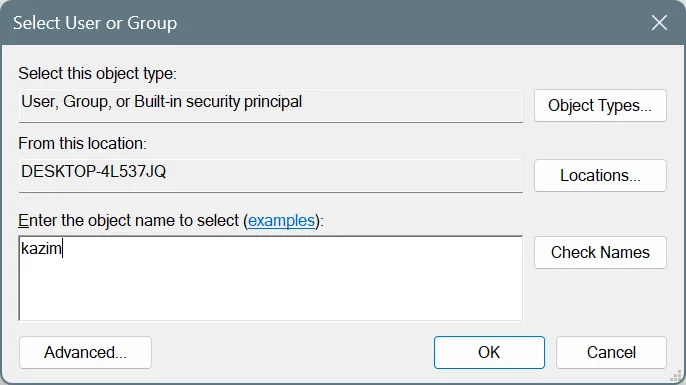
- Enter the active user profile name and click on Check Names.
- Tick the checkboxes for Replace owner on subcontainers and objects and Replace all child object permission entries with inheritable permission entries from this object, and click Apply and OK to save the changes.
- Click Yes in the confirmation prompt.
- Click the Edit button in the Security tab.
- Next, click on Add.
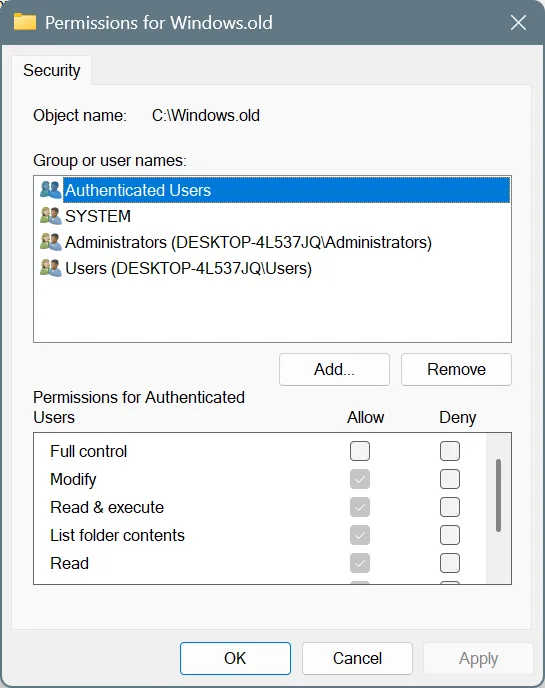
- Again, enter the active user profile name in the text field, click on Check Names, and then OK.
- Now, click Apply and OK to save the changes.
- Finally, after taking ownership of the folder, you can safely delete Windows.old. Just right-click on it and select the Delete icon from the context menu. There should be no errors.
2. Use CMD
You can quickly delete Windows.old using the Command Prompt (CMD) by running a few simple commands. You don’t necessarily have to understand what each command does, as long as you run them as it is and in the listed sequence.
Here’s what you have to do:
- Press Windows + S to open Search, type Command Prompt, and click on Run as administrator.
- Click Yes in the UAC prompt.
- Paste the following commands one at a time and hit Enter after each:
takeown /F "C:\Windows.old" /A /R /D Yicacls "C:\Windows.old" /grant *S-1-5-32-544:F /T /C /QRD /S /Q "C:\Windows.old" - Once done, the folder will automatically be deleted.
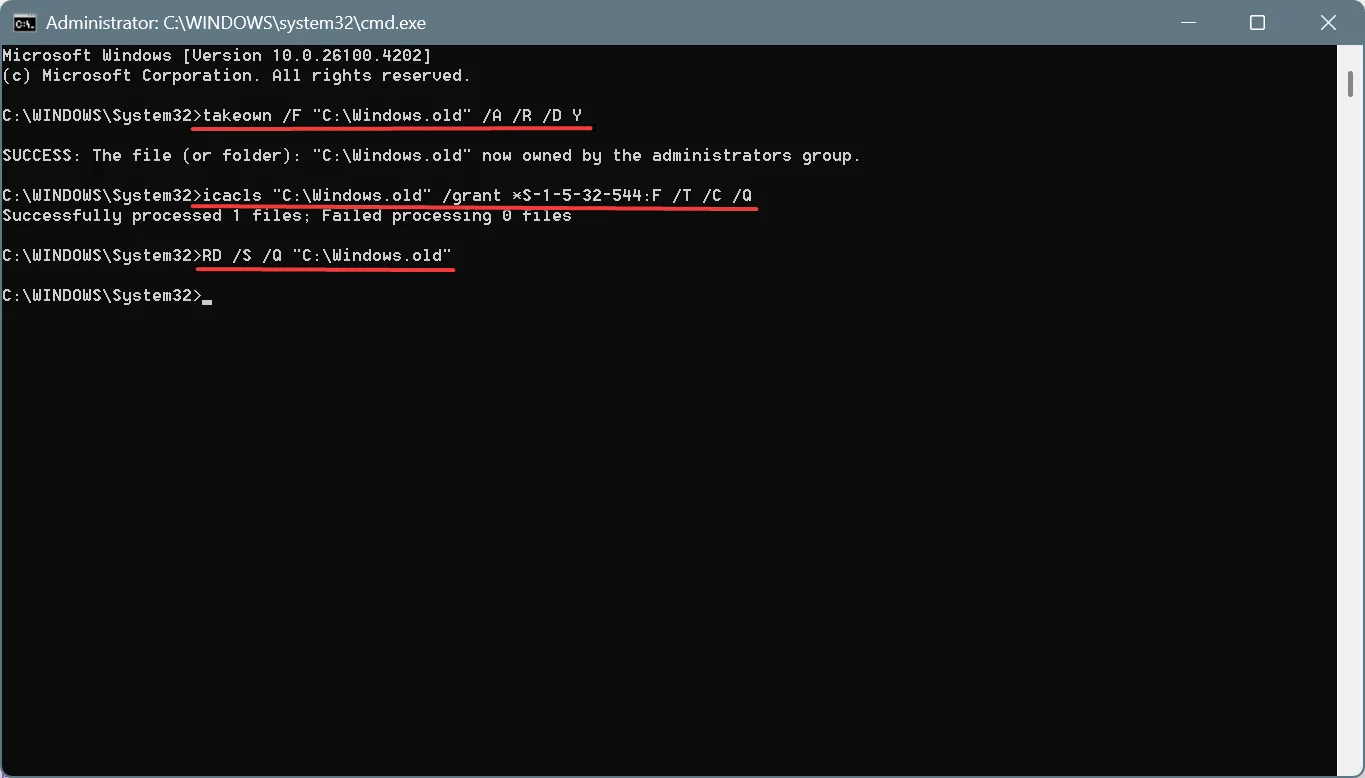
The three commands that we ran earlier first take ownership of the file, then reconfigure the permissions, and ultimately delete the Windows.old folder.
3. Use Disk Cleanup
Disk Cleanup is a built-in Windows utility to free up disk storage on the PC. Many rely on it when deleting Windows.old, and it seamlessly does the job, besides saving you a few minutes.
Here’s what you have to do:
- Press Windows + S to open Search, type Disk Cleanup, right-click on the result, and select Run as administrator.
- Select the system drive (most likely, C:) from the dropdown menu, and click OK.

- In here, tick the checkbox for Previous Windows installation(s), and click on OK.
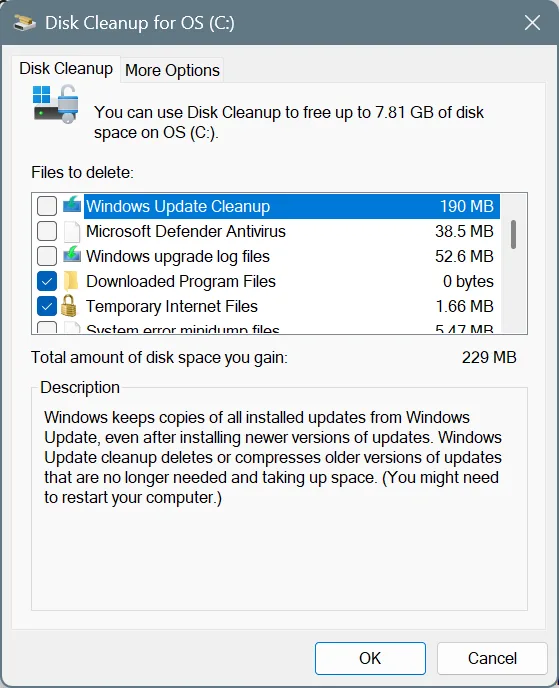
- Click on Delete Files in the confirmation prompt, and choose the appropriate response if other warnings come up.
Running Disk Cleanup also helps when you want to speed up Windows!
4. Use Storage Sense
Storage Sense is another built-in Windows utility, which, when turned on, automatically deletes non-critical system files on a periodic basis that are unnecessarily taking up storage space on the PC. In addition to that, it also makes recommendations as to what files can be deleted by the user, and that includes the Windows.old folder.
Here’s what you have to do:
- Press Windows + I to open Settings, go to System from the navigation pane, and click on Storage.

- Scroll down and click on Cleanup recommendations.
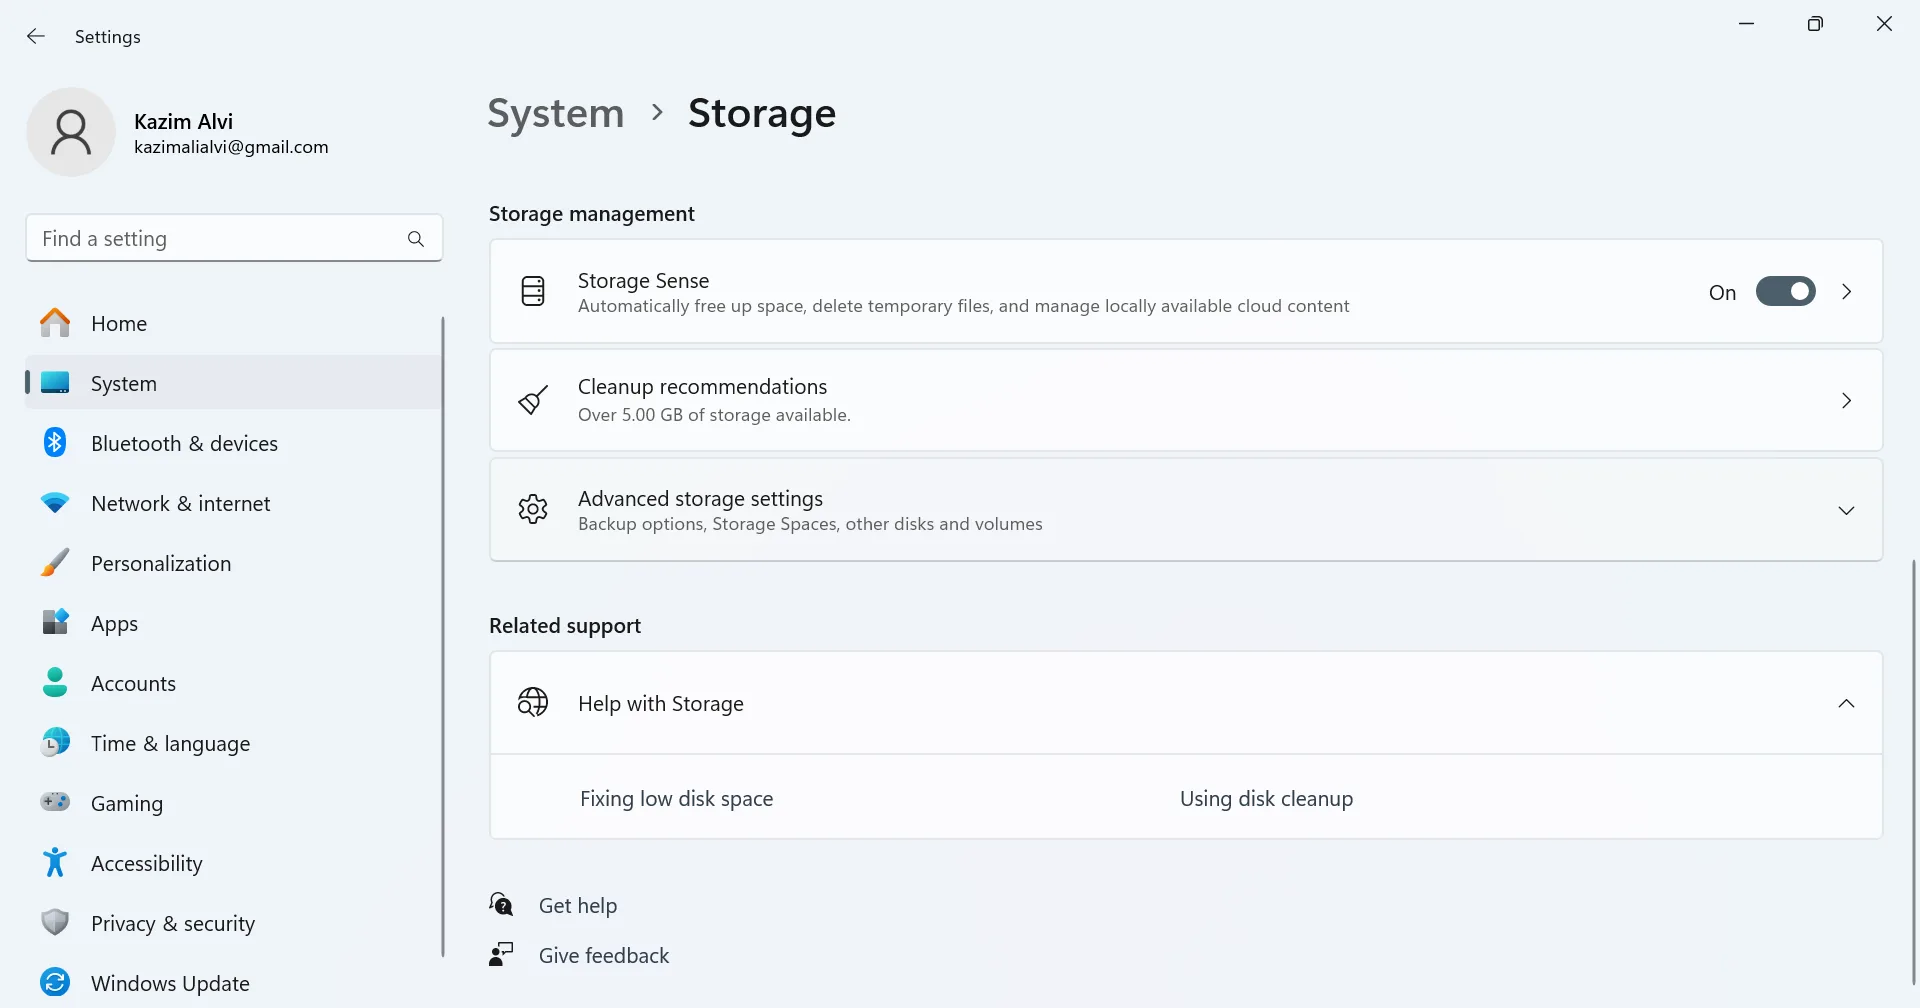
- Select Previous Windows installation(s) and click on Clean up/Remove files.
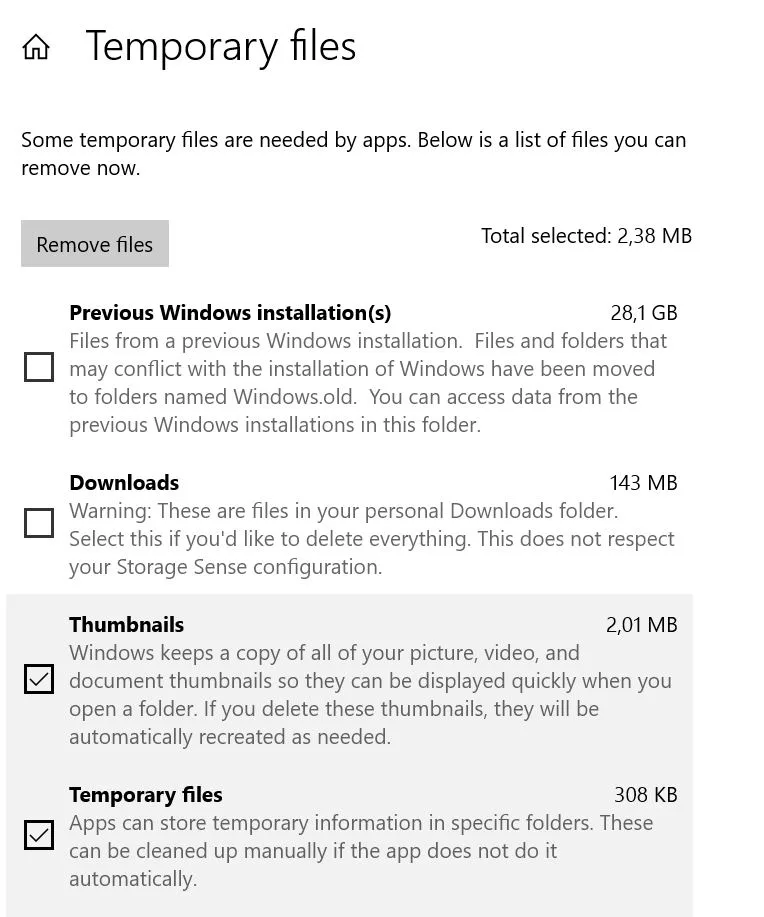
- Click Continue in the confirmation prompt to proceed.
Also Read: Disk Cleanup vs Storage Sense
5. Use a third-party software
Not many tell you, but you can use a third-party tool like CCleaner to delete Windows.old on a Windows PC. In my experience, using a tool is a viable option, especially when you are dealing with system folders, i.e., the ones linked to Windows. Otherwise, a lot of time is spent reconfiguring the permissions.
WindowsExplained earns no commission from the products listed here. They are included solely for their effectiveness!
What can I do if Windows.old is not deleting?
If you can’t delete Windows.old and are running into errors each time, it indicates missing folder permissions. So, all you need to do is take ownership of the folder via its Properties. Make sure the active user profile has full control over the Windows.old folder.
Is Windows.old safe to delete?
Yes, Windows.old is completely safe to delete. The files within the folder don’t directly impact the performance or stability of your PC. Their only role is to facilitate the restore operation (to the previous iteration of Windows), if needed. If you don’t plan on performing a roll back, there are no risks associated with removing Windows.old.
What happens after I delete Windows.old?
After you delete Windows.old, it will instantly free up storage space on the “C:” drive. The folder occupies anywhere between 15-40 GB. So, that’s a massive boost in storage space.
As for the downside, you won’t be able to roll back the upgrade via the built-in options. Instead, you will have to create a bootable Windows USB or use the ISO file to switch back to the previous Windows version!
Those are the 5 ways you can delete Windows.old in Windows 10 or 11. The process is the same for both iterations, although given the slightly different UI, the steps might differ a bit. But we are always there to help you with such issues. Just drop a comment, and we will get back to you at the earliest.
Also, find out how you can delete hiberfil.sys to free up more storage space on the PC!
Before you leave, learn how to partition a drive in Windows and create more volumes. This will streamline data storage and file management, since you can then reserve the “C:” drive for Windows-related files, while other volumes can be used for personal data.

With over five years of experience in the tech industry, Kazim excels at simplifying complex topics, making them accessible to tech enthusiasts and general readers alike. He has contributed to several renowned publications worldwide, including WindowsReport and Allthings.how, bringing insightful coverage of key developments in the field.
Kazim has extensively covered the Windows ecosystem, from the early days of Windows 7 to Windows 11. Unlike many in the field, he’s optimistic about Windows 11, calling it the most user-oriented iteration to date.
When he’s not writing, you’ll find Kazim planning weekend getaways or diving into tech verticals beyond his expertise.