If your Windows PC, especially the storage drive, has been acting weird lately, you should run the CHKDSK utility. It can fix Windows issues such as slow boot, app crashes, and inability to access data. But more importantly, CHKDSK can significantly speed up Windows’ performance!
What is CHKDSK?
Short for Check Disk, the built-in Windows utility, CHKDSK, fixes issues with the storage drive, be it an HDD (Hard Disk Drive) or SSD (Solid State Drive). It identifies and repairs problems like file system errors and bad sectors. Even if it can’t repair bad sectors, Check Disk may still help recover files stored on them. Besides, it marks bad sectors on the drive, preventing their future use.
Let’s now get to running the CHKDSK command, understanding its different variations, and learning the effects of Check Disk!
How can I run the CHKDSK command in Windows?
1. Via Properties in File Explorer
- Press Windows + E to open File Explorer, and go to This PC.
- Right-click on the drive/volume you want to run Check Disk for and select Properties.
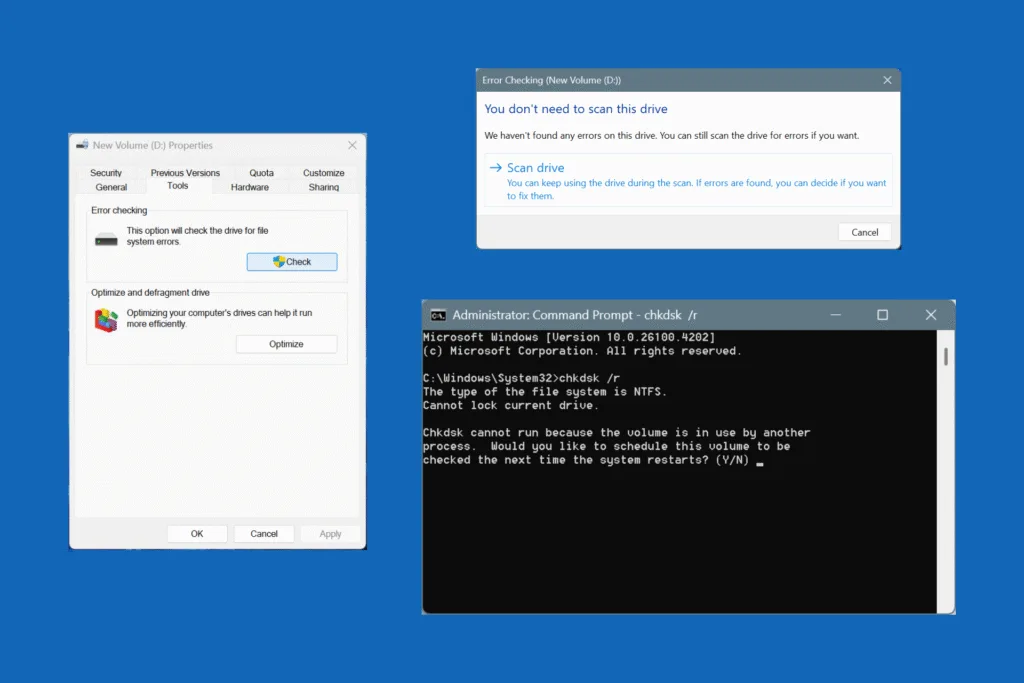
- Go to the Tools tab, and click on Check under Error checking.
- Click on Scan drive in the new window, and wait for the process to complete.
This is the simplest way to scan and repair the storage drive using CHKDSK. But, there’s a catch!
When you perform error checking on the disk via its Properties, the scan isn’t comprehensive and doesn’t always attempt to fix complex issues, such as bad sectors. That’s the reason it usually completes in under a minute. So, if you are facing major issues with the storage drive, I recommend running CHKDSK via Command Prompt for advanced troubleshooting.
2. Via Command Prompt
- Press Windows + S to open Search, type Command Prompt, and click on Run as administrator.
- Click Yes in the UAC prompt.
- Paste the following Check Disk command to scan and repair the “C:” drive and hit Enter. You can replace the drive letter to repair other volumes:
chkdsk /r C: - If asked to schedule the scan, press Y and hit Enter to confirm.
- Finally, restart the Windows PC and let CHKDSK run uninterrupted.
Often, you come across different Check Disk commands, which leads to confusion. Remember, in each command, the first part, chkdsk, is identical, while the switch that comes next (“/f” and “/r”) implies the operation to be performed. The table below explains what each command or switch means:
| Check Disk Command | What it does |
| chkdsk | Simply checks the drive for issues, no repairs are performed. |
| chkdsk /f | Scans for and fixes only the logical file system errors. Helps with data corruption on the drive. Doesn’t take too long to complete. |
| chkdsk /r | Scans for and fixes both logical file system errors and bad sectors. Helps when apps/files don’t open or Windows is running slow. Takes hours to complete. |
| chkdsk /r C: | Specifies the volume (or drive, as some call it) to be scanned instead of the entire disk. You can modify the switch or use another drive letter. |
As you can see, the Command Prompt is a more suitable way to run Check Disk, be it on Windows 10 or Windows 11. The steps for both iterations, too, are identical!
Which command should I run: CHKDSK /f or CHKDSK /r?
If you are confused between the “/f” and “/r” switches while running Check Disk, first identify the underlying problem and then choose which operation to run. The table below will help you make the right choice:
| Check Disk “/f” switch | Check Disk “/r” switch | |
| What it does? | Fixes incorrect file table entries, misplaced directory links, and file metadata issues. | Everything performed by “/f” plus locates bad sectors, attempts to recover readable data from them, and marks bad sectors so they are not used again. |
| When to use? | File or folder names look weird, you get “File not found” errors, and Windows reports file system corruption. | The PC slows down or freezes, and files disappear or show errors when opening. |
How long does Check Disk take?
Running CHKDSK can take anywhere between a few seconds to over 24 hours (in extreme cases). It all depends on the operations being performed and the nature and extent of issues.
As explained earlier, “chkdsk /f” may take 10 minutes to 1 hour since it only checks for problems with the file system, while “chkdsk /r” may take 30 minutes to up to an 24 hours if there are too many bad sectors to be repaired or a large amount of data has to be restored from them. Also, Check Disk via File Explorer only takes a few seconds, in many cases.
When I ran the “chkdsk /r” command, it took Check Disk exactly 22 minutes and 11 seconds to complete the scan/repair!
Besides, the computer’s speed and type of storage drive also play a key role here. On SSDs, Check Disk runs much faster than HDDs due to higher read-write speed!
How can I view the CHKDSK log file?
Running Check Disk is a task half done. Next, you need to view the CHKDSK logs and find out the identified issues and the repairs that were made. Although you can skip the step if you are not interested in the details or the initial problem that triggered the need for Check Disk is fixed.
- To view Check Disk logs, press Windows + S > type Event Viewer > click on the relevant result > expand Windows on the left > select Application under it > click Filter Current Log on the right > under Event sources, select Chkdsk and Wininit > click OK > the recent Check Disk logs will be listed.
Under the Wininit log, you can find out the total time taken by Check Disk.
When should I use Check Disk?
Experts recommend periodically running Check Disk, say once every 3 months, to optimize disk performance and reduce the possibility of data loss. Also, you should run it immediately in the following cases:
- The computer frequently crashes or shuts down automatically
- Files/folders return errors, when opened
- The drive has suddenly slowed down
- Windows shows a Blue Screen of Death (BSOD) error
- If a malware or virus has been detected on the PC. Remove the threat first, followed by CHKDSK
Does CHKDSK fix corrupt files?
No, Check Disk can’t fix corrupted files or make them readable again. The utility targets file system issues and bad sectors, not individual files. But, if the file is stored on the bad sector, Check Disk may help restore it.
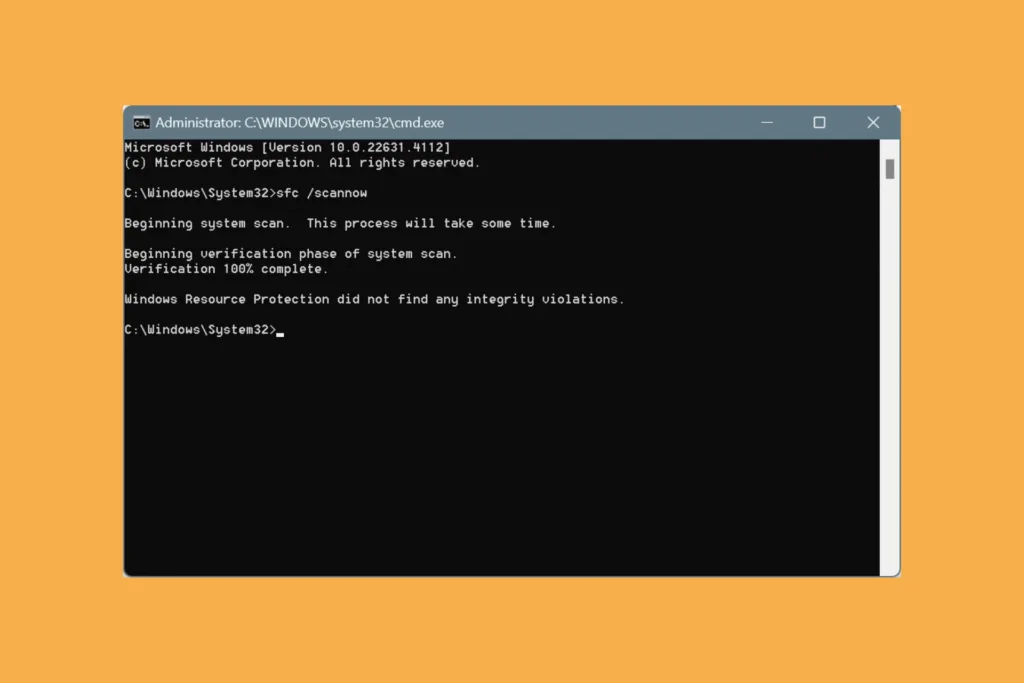
In case you want to fix corrupted system files, the SFC Scan utility is the best built-in option in Windows. It identifies and repairs/replaces corrupted or missing protected system files.
Does CHKDSK delete corrupted files?
In 9 out of 10 cases, Check Disk won’t affect the files on your PC. But occasionally, a few files may get deleted when:
- The CHKDSK scan is interrupted
- The file is stored on a bad sector
- The file itself is corrupting the file system
Again, the possibility of this happening is bleak, and the benefits of Check Disk far outweigh the drawbacks!
By now, you know almost everything about CHKDSK or Check Disk, at least everything that’s considered crucial. So, from now on, scan the storage drive for issues and repair it every few months to enjoy an error-free Windows experience. But don’t overdo it. Running Check Disk every day or week won’t do any good, it’s just a waste of time!
Before you leave, find out how to partition a drive and create more volumes in Windows. This will help you streamline file storage and data management.
For any queries or to share your experience running CHKDSK, drop a comment below.

With over five years of experience in the tech industry, Kazim excels at simplifying complex topics, making them accessible to tech enthusiasts and general readers alike. He has contributed to several renowned publications worldwide, including WindowsReport and Allthings.how, bringing insightful coverage of key developments in the field.
Kazim has extensively covered the Windows ecosystem, from the early days of Windows 7 to Windows 11. Unlike many in the field, he’s optimistic about Windows 11, calling it the most user-oriented iteration to date.
When he’s not writing, you’ll find Kazim planning weekend getaways or diving into tech verticals beyond his expertise.