Slow Internet speed on Windows is a more common issue than you can imagine. A few GBs of downloads taking hours to complete, online games getting stuck midway, or file uploads not progressing are all signs that you need to improve your Internet speed. But is getting a faster Internet plan the only solution?
Not necessarily! If the current network settings are misconfigured, you can simply optimize them for best network performance and enjoy faster downloads and uploads in Windows. Before we move to the network optimization part, let’s understand the reasons behind a slow Internet speed in Windows.
Why is the Internet so slow on my computer?
- PC is far away from the router
- Network settings are limiting the Internet speed
- Background tasks have high network consumption
- Network adapter drivers are outdated or corrupted
- System is infected with malware or a virus
- Browsing data is corrupted
- Windows is reserving significant network resources
How can I boost the Internet speed on Windows?
The steps outlined here are applicable across different versions of Windows, including Windows 7, Windows 10, and Windows 11. Since I am currently running the latest iteration, Windows 11, the steps provided reflect that version. While the process should be the same on older versions, you may notice slight differences in interface on your PC
1. Configure an optimal network setup
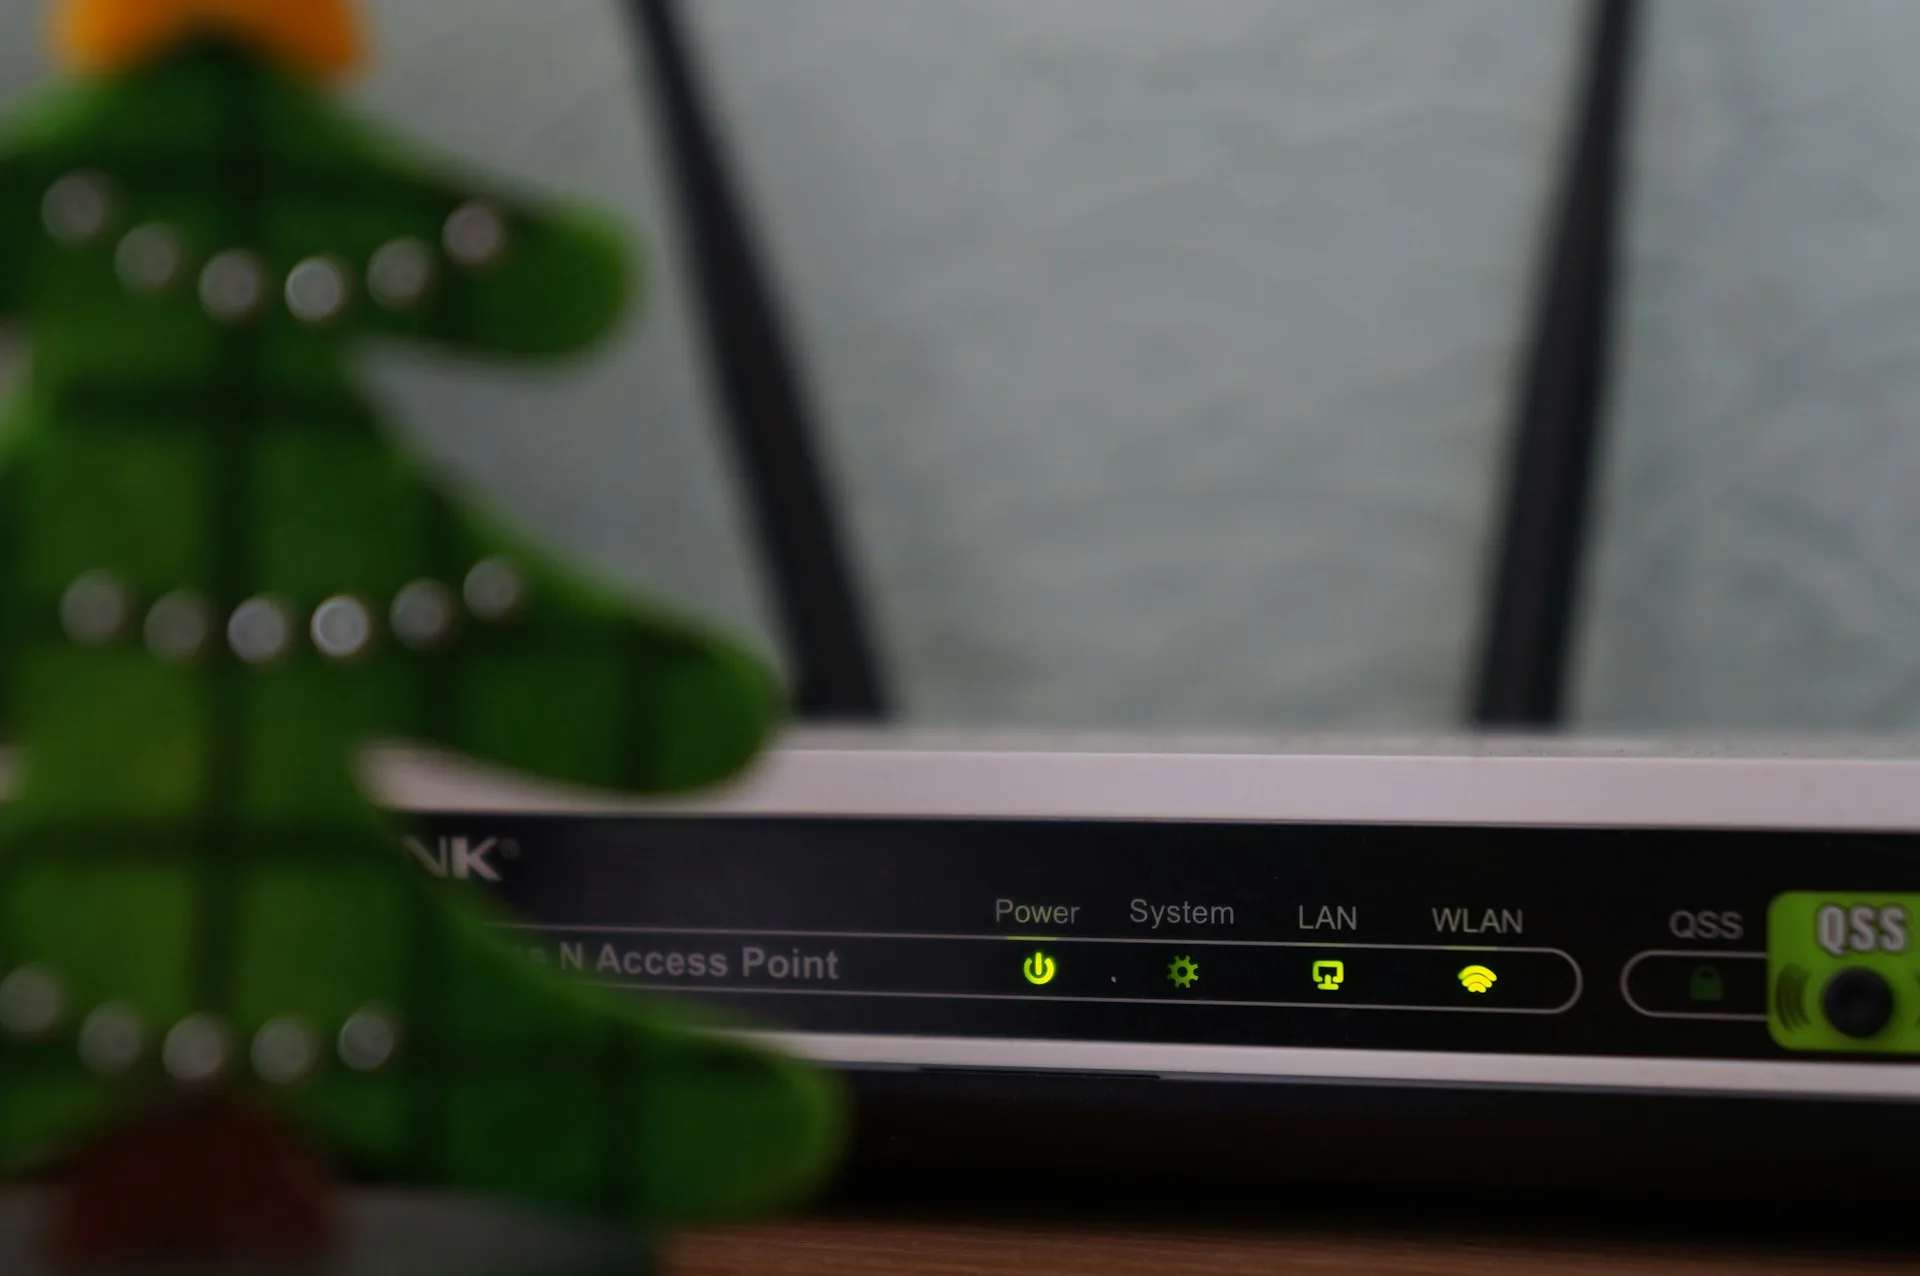
First and foremost, you need an optimal physical network setup designed for higher Internet speed. To do this (for a router):
- Bring the router closer to the PC, within a 2-5 metre range.
- Place the router at the same height as the computer.
- Make sure there are no obstructions around the router.
- If you have a dual-band router, verify that you are connected to the 5 GHz band and not the 2.4 GHz band.
- Disconnect additional devices from the network. The fewer the devices on the network, the higher the Internet speed on your PC.
- Password-protect your router to avoid unauthorized devices from connecting to it.
After making these changes, verify whether the Internet speed is still slow on your Windows PC. If so, it’s the software configuration to blame!
2. Adjust the network adapter settings
Next up are the misconfigured adapter settings, a key reason behind slow Internet on Windows. And to boost the Internet speed, you simply need to configure it for enhanced network performance. Here, we will be choosing 5 GHz as the preferred band and enabling “Throughput Booster“!
- To do that, press Windows + X to open the Power User menu > select Device Manager > expand Network adapters > right-click on the active adapter (Wi-Fi or Ethernet) > select Properties > go to the Advanced tab > choose Preferred band under Property > select Prefer 5 GHz band under Value > choose Throughput Booster under Property > select Enabled under Value > click OK to save the changes > restart the computer.

For some of you, “Throughput Booster” might not be listed as a network adapter property. If so, simply skip the step and only select 5 GHz as the preferred band.
Besides, a few online tutorials recommend changing the interface protocol to 802.11n to increase the Internet speed. However, the default selection, “Dual Band 802.11a/b/g,” should work fine, as long as your PC is close to the router and you are not on a very high-speed plan!
3. Update the active network adapter’s driver
If optimizing the adapter properties doesn’t help maximize the Internet speed, it could be the installed driver to blame. Ideally, Windows picks the most suitable driver version for each device, but it often misses a newer version with improvements and enhancements, especially when the newer version is released exclusively on the manufacturer’s website. So, you must update the driver for the active network adapter!
- To do that, visit the manufacturer’s website > go to the Downloads section > search for your PC using the model name > choose the operating system > locate the latest network adapter driver > download the .exe file > run the setup > follow the on-screen instructions to complete the installation process.
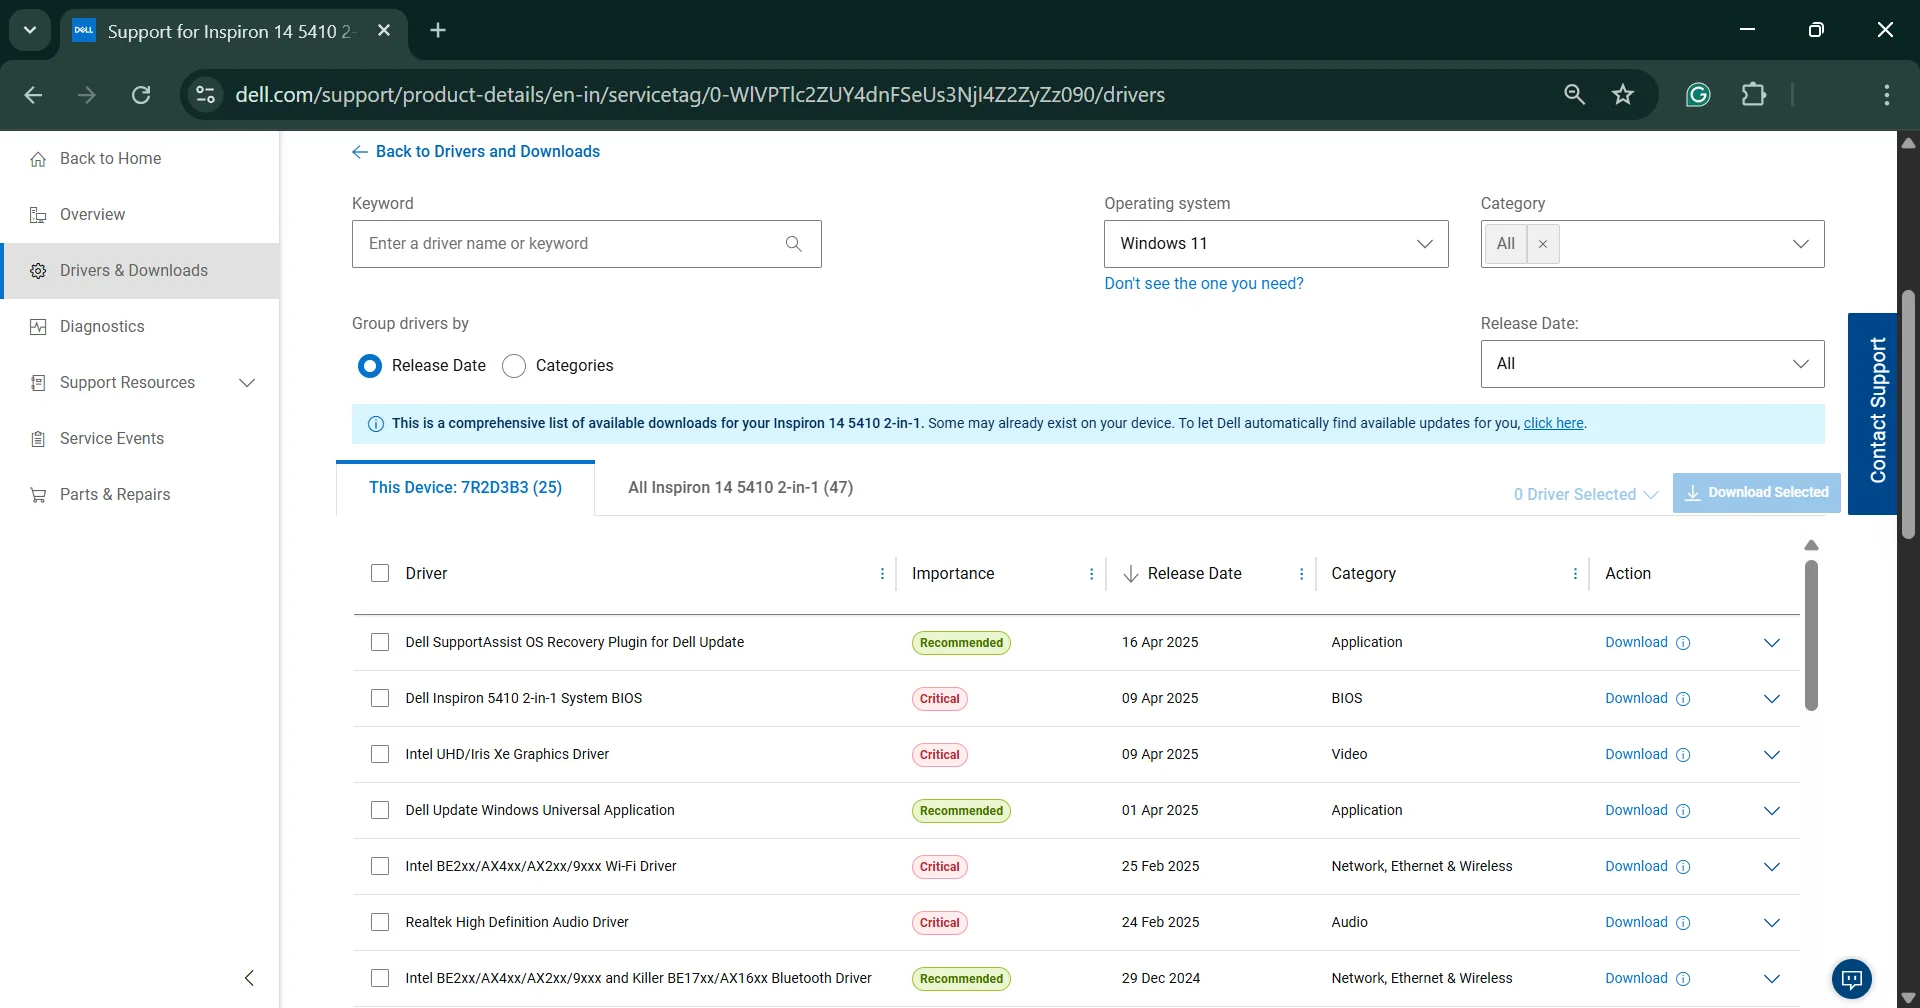
Some manufacturers also include a driver identification tool that automatically detects and recommends available driver updates. In case there’s one on your OEM’s website, use it.
Besides, if you face any issues with the latest driver version, you can always roll back the driver update!
Updating or rolling back the driver also helps when the Internet is not working in Windows.
4. Switch to a public DNS
Think of DNS (Domain Name System) as the Internet’s directory. It converts human-understandable domain names into their corresponding IP addresses, which machines understand. Now, when your DNS is slow, it will take longer to fetch and load a website after you enter the domain name. To fix this, you should switch to Google’s Public DNS or another from a reputable source, say Cloudflare.
- To change the DNS server, press Windows + S to open Search > type View network settings > click on the relevant result > right-click on the active network adapter > select Properties > choose Internet Protocol Version 4 (TCP/IPv4) > click Properties > select Use the following DNS server addresses entry > enter 8.8.8.8 and 8.8.4.4 as the Preferred DNS server and Alternate DNS server respectively > tick the checkbox for Validate settings upon exit > click OK to save the changes.

Once done, you should witness some degree of improvement in the Internet speed on Windows. If not, use another public DNS or the fastest DNS server in your region!
5. Minimize the bandwidth reserved by Windows
Did you know that Windows reserves a certain amount of network bandwidth to perform system-related operations? This, in turn, forces other apps and browsers to use the leftover bandwidth, which affects your browsing experience and gives the impression of slow Internet speed in Windows.
However, you can limit this reserved bandwidth to the minimum and allow apps that you are actively working on to utilize maximum network resources. To make these changes, we will rely on the Local Group Policy Editor. If you are on the Home edition of Windows, you must first install the Local Group Policy Editor (GPEDIT.msc).
- To minimize the reserved bandwidth in Windows > open the Local Group Policy Editor > expand Administrative Templates under Computer Configuration > double-click on Network > choose QOS Packet Scheduler > double-click on Limit reservable bandwidth > select Enabled > set Bandwidth limit to 5% > click Apply and OK to save the changes.

Remember, the 20% cap on bandwidth isn’t absolute but only comes into effect when Windows is performing high-priority tasks. When no such tasks are underway, the reserved bandwidth is released for use by other apps and processes. Still, I recommend reducing the limit, and if there’s no improvement in Internet speed on Windows, reverting to the default configuration!
6. Limit background Windows updates
When Microsoft releases a new Windows update, your PC automatically downloads it in the background. During this period, other network-oriented tasks may feel laggy, giving the impression of slow Internet speed on your Windows PC. But, as soon as you limit Windows’ ability to install updates in the background, the download and upload speed will reach its maximum level!
- To limit background Windows updates, press Windows + I to open Settings > go to Windows Updates > select Delivery Optimization > expand Download options > tick the checkbox for Background limit as a % > enter 5 in the text field.
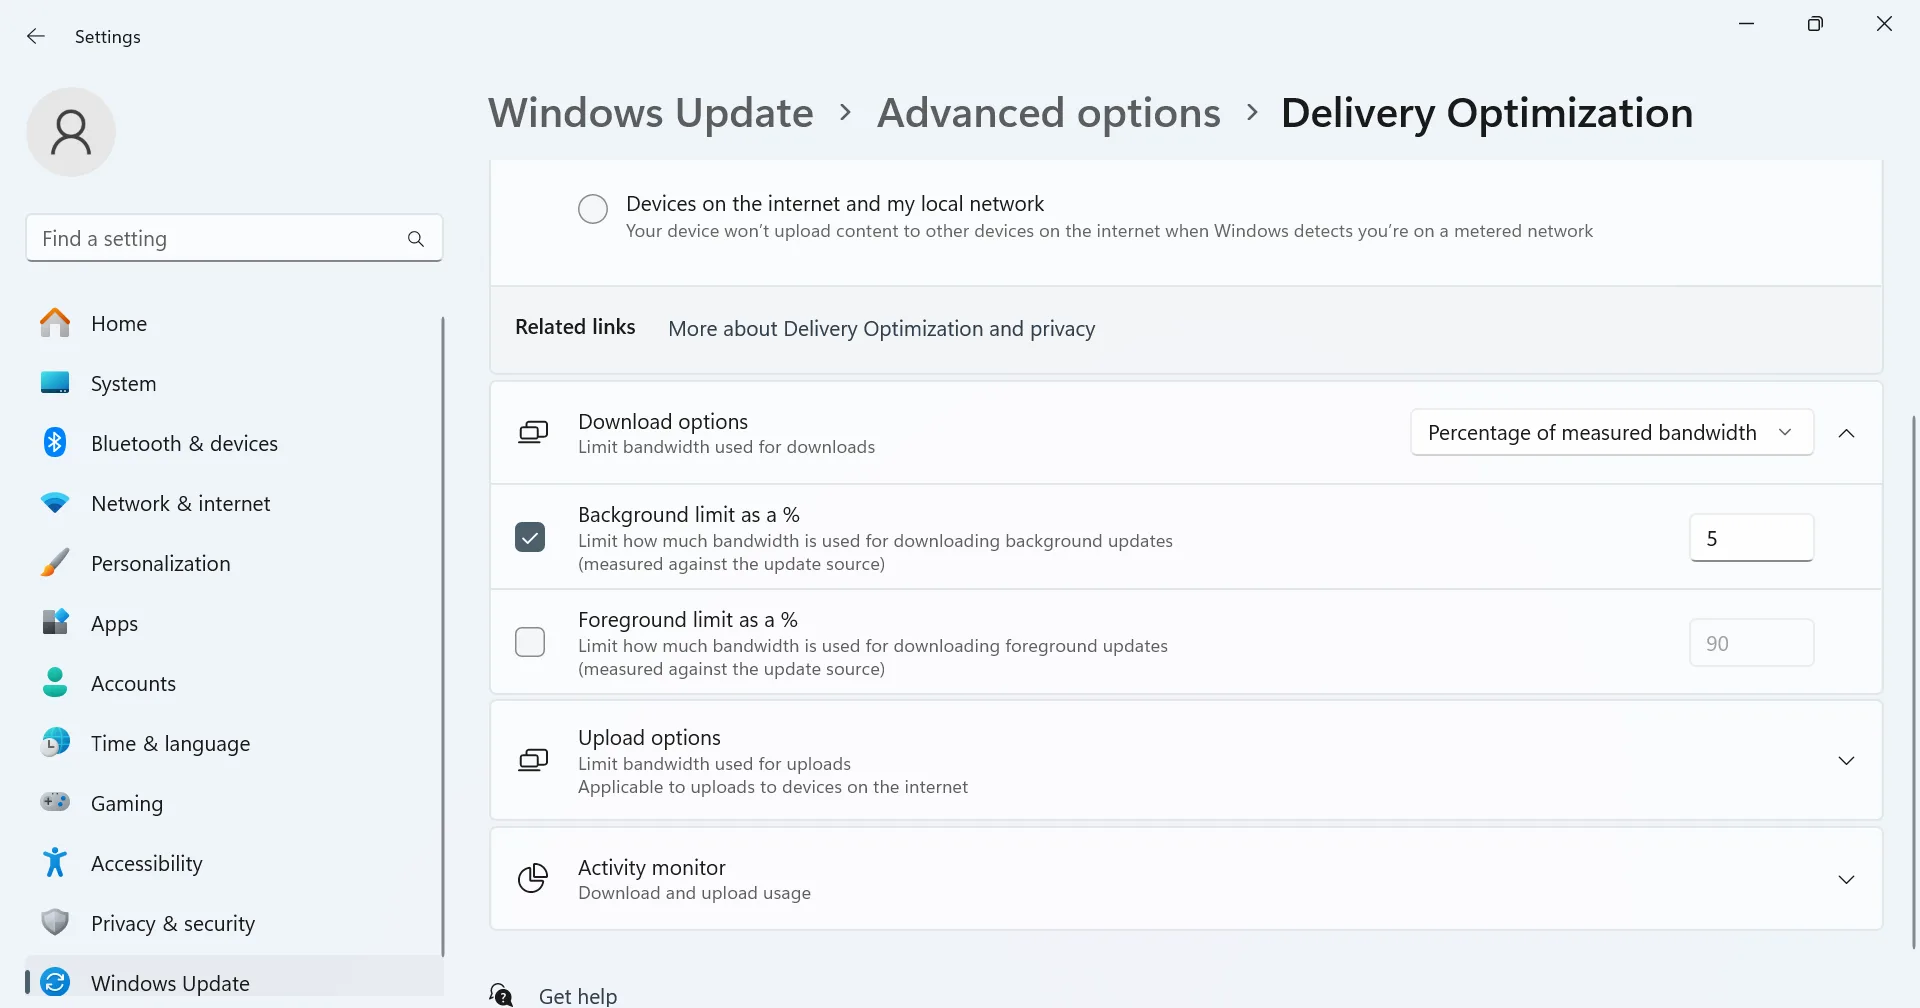
Now, Windows won’t prioritize downloading updates in the background. However, you also run the risk of not getting critical updates and bug patches automatically. So, after limiting background updates, make it a habit to periodically check for Windows updates, say, every week, and manually download all pending ones!
7. Terminate resource-intensive tasks
Some apps, especially cloud storage platforms, perform regular uploads and downloads, hogging the network resources on your PC, leaving little for other apps. To fix this, you will need to either disable these apps completely or configure their backup schedule for a period when you are not actively working on the system.
Now, coming to how you can identify which apps are consuming the maximum network resources in Windows. While most recommend getting a dedicated third-party tool for the job, you really don’t need that. Windows offers a built-in tool, the Resource Monitor, which lists out the network activity of all active processes.
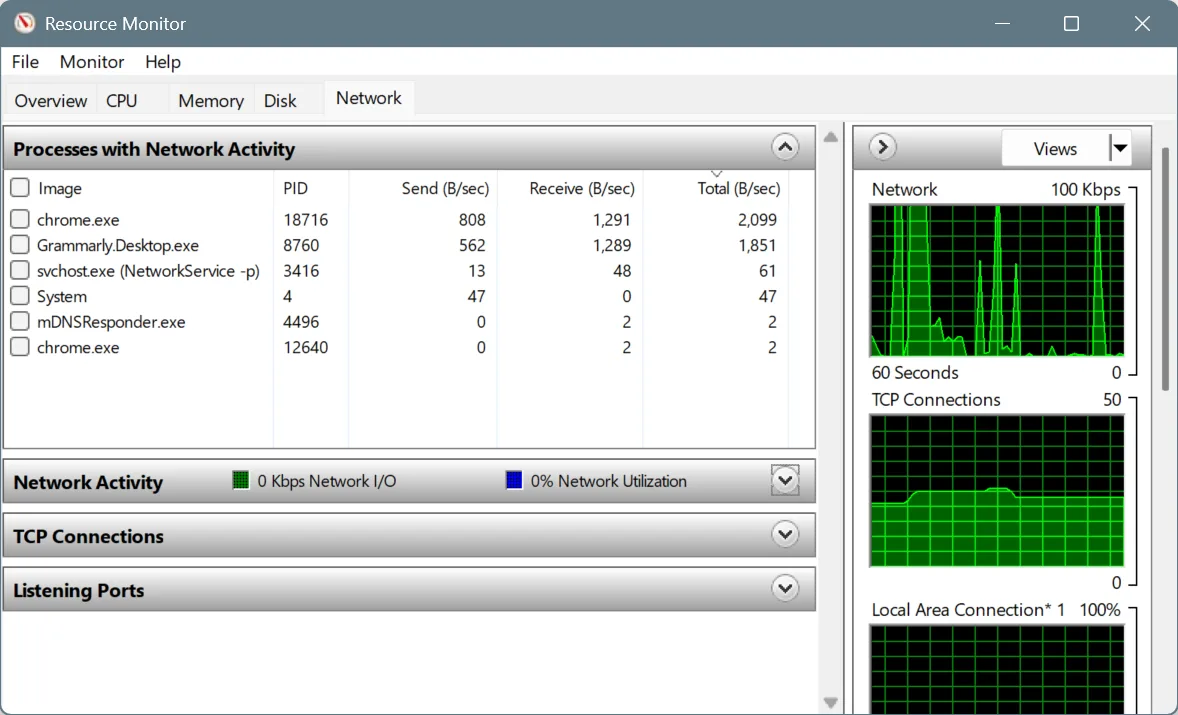
You can now find out which apps, programs, or processes are performing upload and download tasks in the background and limit their use of resources via the Task Manager or the app’s built-in settings!
8. Scan your PC for malware
When I earlier talked about speeding up a Windows PC, I mentioned how a malware infection can increase the resource consumption, primarily, the CPU and RAM. But network resources, too, are affected, especially when dealing with a virus that regularly sends and receives data to threat actors or performs crypto mining operations. So, you must regularly scan the PC for malware and eliminate any threats!
- To run a malware scan in Windows > press Windows + S to open Search > type Windows Security > click on the relevant result > choose Virus and threat protection > pick Scan options > select Full scan > click on Scan now.

If Windows Security fails to detect active threats, you should get a top-rated third-party antivirus and perform an advanced scan. These antivirus solutions are more up-to-date with the latest threats and perform a much better job. Popular choices include Norton, Avast, and Malwarebytes!
9. Reset the network settings
Do you have a habit of tinkering with the Windows PC, especially the software side of things? If so, it’s likely that one of the changes made to the network settings is throttling the performance and leading to slow Internet speed on Windows.
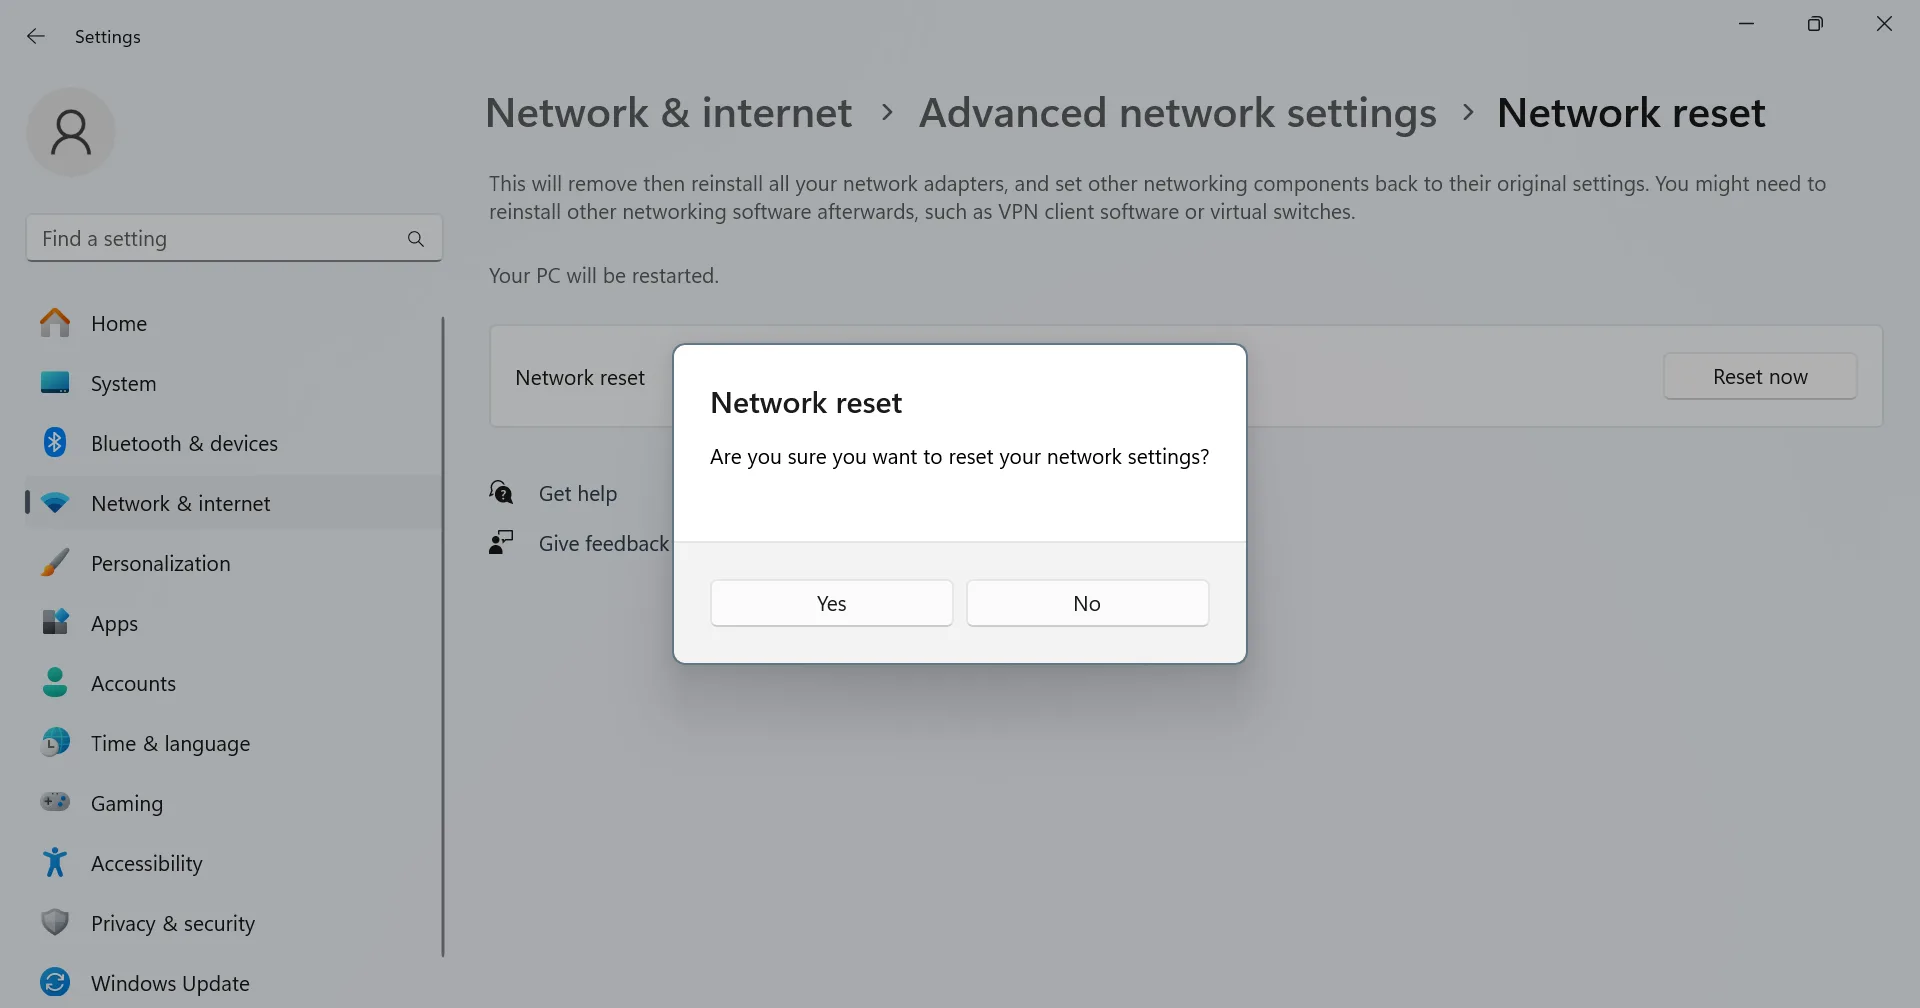
Now, identifying the problematic setting is a challenge. I wouldn’t recommend you spend hours on it with no real hope of a breakthrough. Instead, a viable option is to reset the network settings altogether. This would revert the network properties to the default settings, getting you the maximum Internet speed in Windows!
- To reset the network settings in Windows, press Windows + I to open Settings > go to Network & internet > select Advanced network settings > choose Network reset > click on Reset now > click Yes to confirm the change.
10. Clear the browsing data if a website is loading slowly
Is a specific website loading slowly while others work fine? If so, it could be the corrupted cache to blame, while you are confusing it with slow Internet speed on Windows. In my experience, this is the case 3 out of 10 times. And no matter which settings you reconfigure or reset to default, the problem will persist, since it’s a browser-based problem.
To verify whether the website’s local cache is corrupted, load it on another browser. If it loads quickly, you now know what’s triggering the issue!
- To fix this, open your regular browser, load the website > click on the View site information button > choose Cookies and site data > select Manage on-device site data > delete all the entries here.
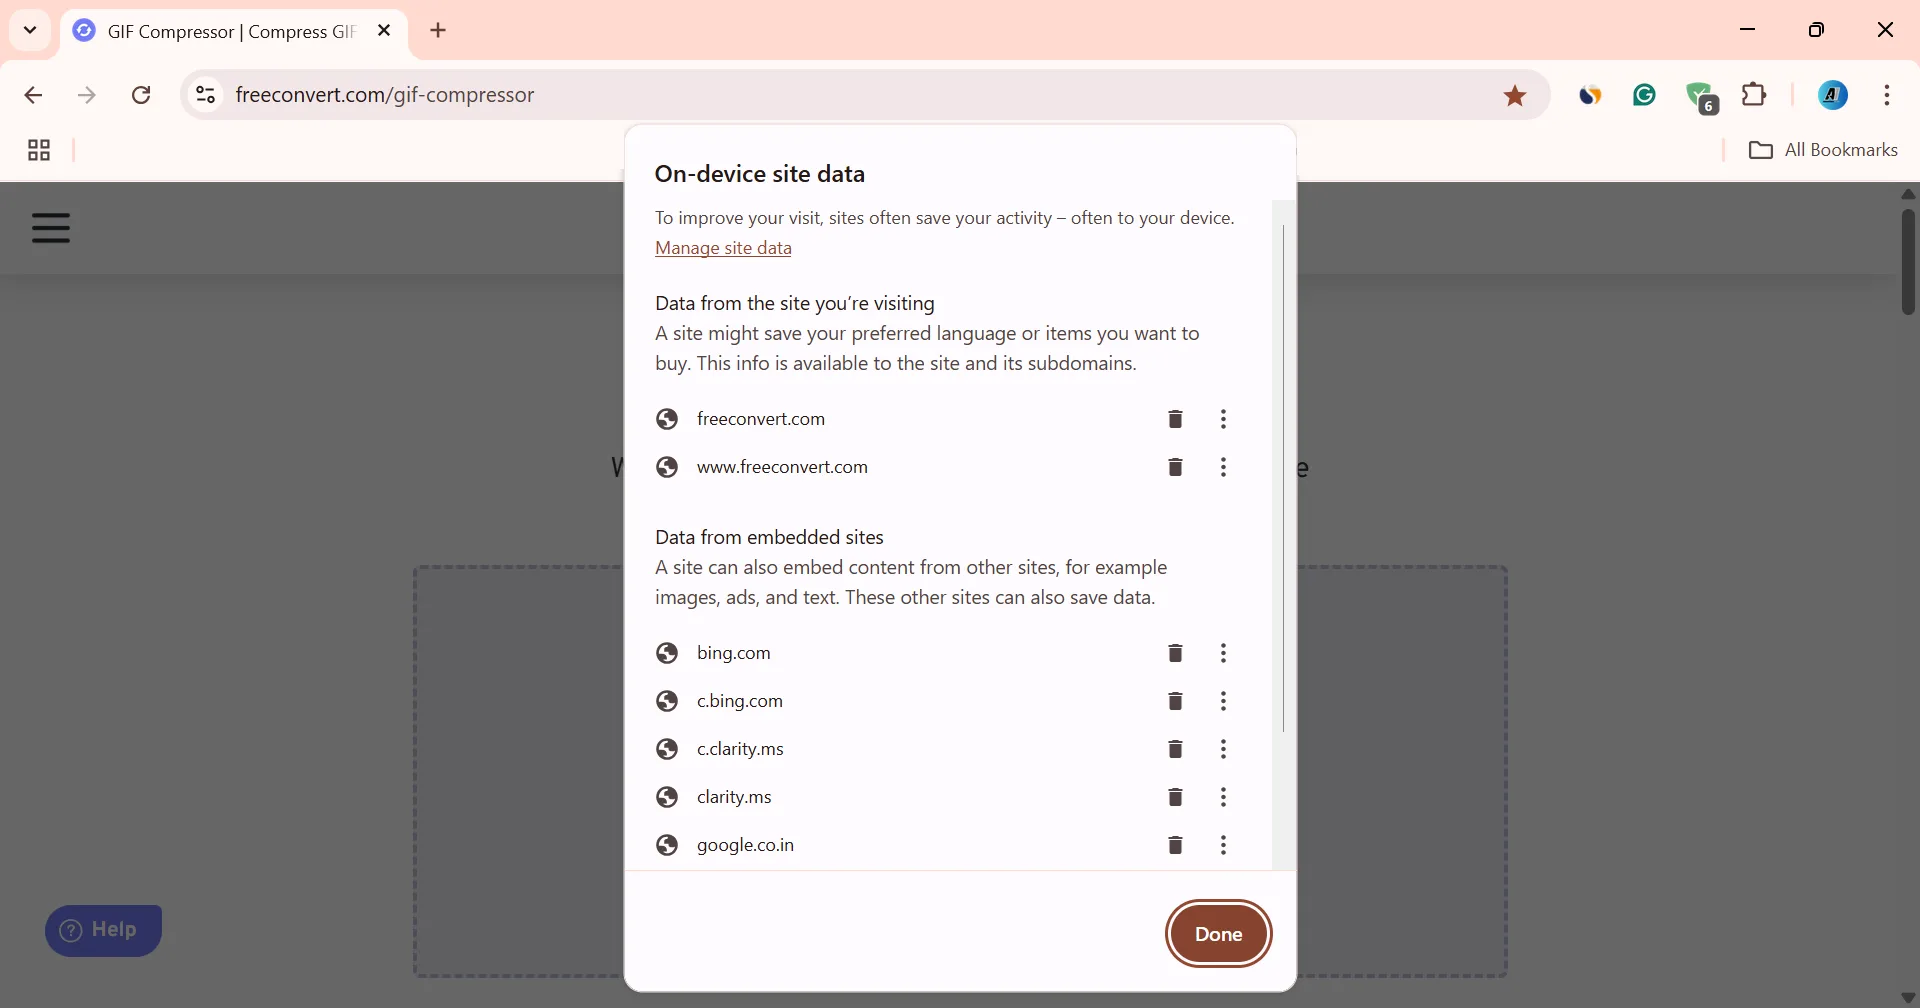
This will speed up loading only for a single website. However, if several sites are affected by corrupted on-device data, you will need to clear the entire browsing data.
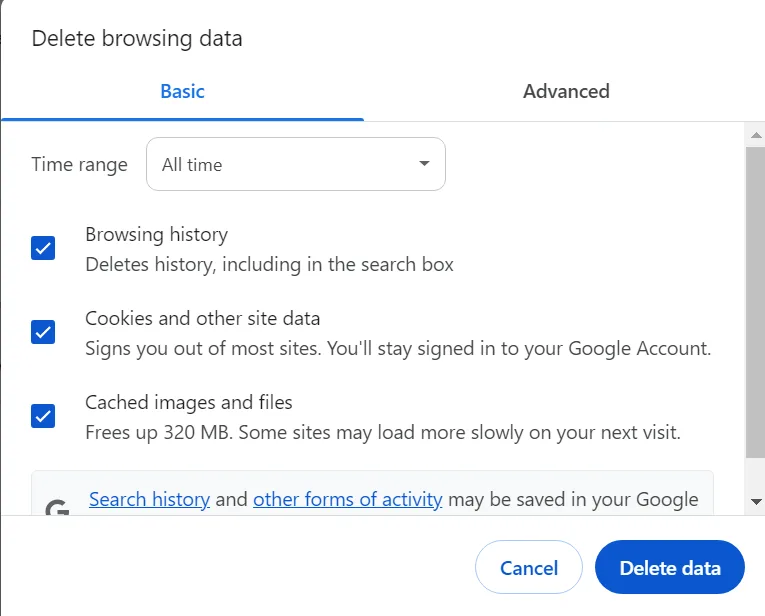
- To do that, open your browser > press Ctrl + Shift + Del > select All time under Time range > tick the checkboxes for Browsing history, Cookies and other site data, and Cached images and files > click on Delete data.
11. Create a new user profile in Windows
Over time, as more apps and programs are installed, the available bandwidth for individual apps decreases. This could be the case with your current account. So, as a last resort, create a new user profile/account on Windows for key tasks that require a high Internet speed, say, gaming. Make sure not to add other non-critical apps or programs to the new profile. Keep it exclusively for network-intensive tasks!
- To create a new user profile in Windows > press Windows + R to open Run > type netplwiz > hit Enter > click on Add > choose Sign in without a Microsoft account > pick Local account > enter the details for the new account (password is not needed for a local account) > confirm the account creation > select the new account from the list > click Properties > go to the Group Membership tab > select Administrator > click Apply and OK to save the changes.
Once done, sign in to the new Windows account, install the required app(s), and enjoy a faster Internet speed. Besides, if you plan to make this the primary user profile, consider setting up automatic, password-less login for Windows!
What is a good internet speed on PC?
While we have discussed enough about fixing slow Internet speed in Windows, we are yet to ascertain what a good or reasonable Internet speed is on a PC. In 2025, I would say anywhere between 50-100 Mbps should suffice for browsing and basic gaming. If you’re into tasks that heavily rely on the Internet, go with a 200-300 Mbps plan.
Remember, in the next ten years, 50-100 Mbps will become obsolete, and 200-300 Mbps will be the new normal. My first Wi-Fi connection from twelve years ago had a speed of 128 Kbps, while I am now on a 200 Mbps plan.
You know have a fair understanding of boosting the Internet speed on a Windows PC. If it’s still not up to the mark, I recommend switching to Ethernet or a wired connection.
On a wireless connection, too many factors are involved, resulting in a loss of Internet speed, while with a wired connection, there is minimal loss. And there’s no investment involved. Most routers these days come with an Ethernet cable. Just plug one end into the Ethernet port on the PC and the other into the LAN port on the router, and you are good to go!
If you are facing slow Internet, specifically while browsing the Internet, learn expert tips to speed up Google Chrome.
For any queries or to share what helped you fix slow Internet speed in Windows, drop a comment below.

With over five years of experience in the tech industry, Kazim excels at simplifying complex topics, making them accessible to tech enthusiasts and general readers alike. He has contributed to several renowned publications worldwide, including WindowsReport and Allthings.how, bringing insightful coverage of key developments in the field.
Kazim has extensively covered the Windows ecosystem, from the early days of Windows 7 to Windows 11. Unlike many in the field, he’s optimistic about Windows 11, calling it the most user-oriented iteration to date.
When he’s not writing, you’ll find Kazim planning weekend getaways or diving into tech verticals beyond his expertise.